
A modern wedding cake earns its place in the room through scale, silhouette, and texture. Plastic couple figurines shrink into visual noise once guests step away from the dessert table. A strong riser, an assertive letterform, and deliberate lighting give the display enough structure to hold its own against exposed brick, tall ceilings, and industrial furniture.
The practical standard is simple: build the cake station for the wide reception photograph first. Detail shots will follow.
In this Article
- The Architectural Dessert Display
- The Evolution of Cake Typography
- High-Contrast Textures and Geometric Styling
- Integrating Favors Into the Dessert Experience
- Staging the Perfect Cake Cutting Station
The Architectural Dessert Display
The shift toward architectural cake styling came from post-reception photo galleries rather than mood boards. Across eight years of event styling, Liam Davis found that resin bride-and-groom figurines held their detail only in photographs taken from under three feet away. In wide room views, those same toppers dissolved into an unreadable lump.
That observation changed the build order. The display now begins with the room sightline, then moves inward toward the cake.
A standard arrangement uses a 6-foot banquet table at 30 inches deep. Leaving 14 to 18 inches of clear surface behind and beside the cake gives the couple room to turn, pose, and cut without backing into gathered linen or a floral cluster. The empty surface also creates visual breathing room around the cake, which matters when the backdrop already contains brick joints, conduit, or dark window frames.
Stacking 6-, 8-, and 10-inch tiers produces somewhere around 14 to 16 inches of height. Placing that set on a 5- to 7-inch riser brings the topper close to 60 to 66 inches from the floor. That position lands near standing eye level for guests moving through the reception instead of leaving the design stranded below their natural line of sight.
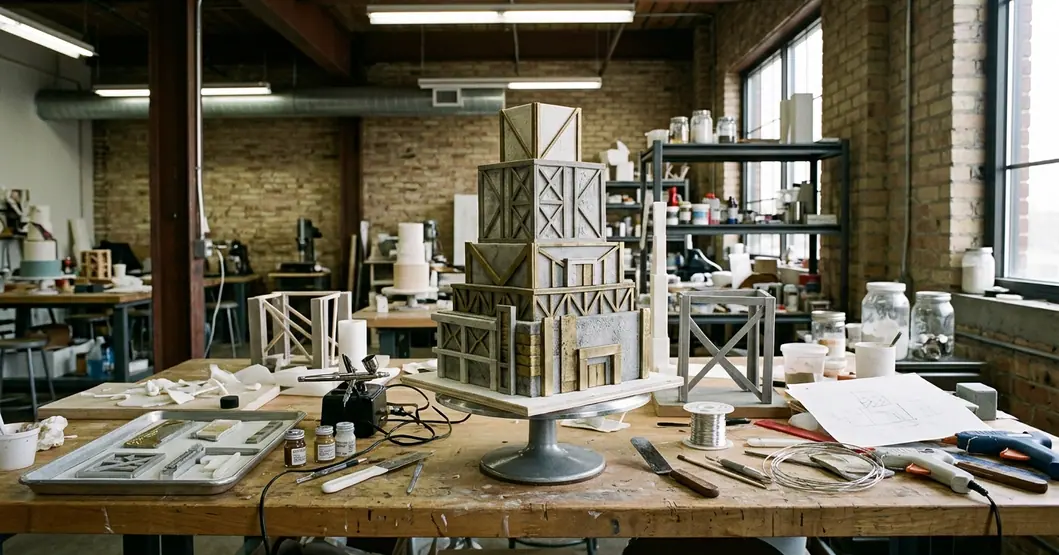
The 18-Foot Read
Once the riser is set, the display needs a distance check. Photograph it with a phone from 15 to 18 feet away, the typical span between a dessert station and the nearest guest table in a converted warehouse floor plan. If the topper loses its shape, changing the ornament’s scale alone rarely solves the problem. Stronger letter weight, cleaner negative space, or a better-lit backdrop usually does.
Build From Distance
Fix the riser height first, size the topper against the phone read-test second, and place favors or coasters last. This three-pass sequence separates an architectural display from a cake carrying an ornament.
Abstract geometry works because it supports the whole room. A black arc can echo bentwood chairs. A brushed-metal monogram can answer steel beams overhead. These relationships register in wide photographs even when guests cannot see every small detail.
The Evolution of Cake Typography
Curly script monograms dominated much of the mid-2010s, yet their thin connectors created both visual and structural problems. An early run of hand-cut 1.5mm wood-veneer script made that weakness obvious: two toppers snapped in transit at the hairline connection between a capital flourish and the following letter.
Bold serif typography gives the cake more dependable visual weight. Thick vertical strokes remain readable across a dim room, while compact serifs add character without producing a web of fragile curls. For a single word or monogram, a cap height between 3.5 and 5 inches creates a useful starting range. Every stroke should remain at least 4mm wide so no section of the letter becomes thinner than the material supporting it.
Acrylic That Holds Its Line
Laser-cut cast acrylic has become the working method for floating calligraphy and serif toppers because it produces clean interior counters and integrated support prongs. A 3mm sheet suits toppers up to about 9 inches wide. Wider designs move to 5mm acrylic; the thinner sheet can bow visibly in humid summer venues.
The laser kerf runs roughly 0.2mm, so the vector file should be drawn at final size rather than offset. That small production choice matters around tight spaces such as the bowl of a lowercase “a,” where an unnecessary adjustment can close the opening and force a reorder.
- Set the final cap height and keep every stroke at or above 4mm.
- Choose 3mm cast acrylic for designs up to about 9 inches wide and 5mm for broader pieces.
- Extend the support prongs 2.5 to 3 inches from the base of the lettering.
- Sleeve or wrap each prong in a food-safe barrier before it enters the cake.
- Chill the cake for 20 to 30 minutes before seating the topper so the top tier holds its edge.
A laser-cut topper typically takes 7 to 12 business days from file to delivery. Ordering 3 to 4 weeks before the wedding leaves room for one proof revision, which is especially useful when names contain narrow interior spaces or long serif terminals.
The goal is a topper that appears suspended above the top tier while behaving like a stable fabricated component. Typography supplies the decoration; sound material dimensions keep it upright.
High-Contrast Textures and Geometric Styling
The Chicago Factory approach treats color as the least reliable variable in a raw-brick venue. Wall tone, uplighting, and daylight can all shift it. Physical texture remains visible because it creates its own highlights and shadows.
Choose the buttercream finish first, then specify the topper material as its opposite. A rough-troweled plaster finish or deep palette-knife swipes pair especially well with a stark matte black geometric topper. The buttercream catches warm pin light; the acrylic supplies a flat, controlled edge.
Texture Before Topper
Chill the crumb coat for 12 to 20 minutes in a walk-in held around 38 to 40°F before applying the finish coat. A soft crumb coat catches on a comb and drags cake particles through the final texture. Once chilled, work with a 6-inch bench scraper or a 4-inch offset palette knife.
Move the tool in one direction per tier. Horizontal combing on one tier and diagonal swipes on the next can read as an execution error unless the full display repeats that change deliberately.
- Leave the protective film on matte acrylic until final placement.
- Handle the exposed topper by its edges because fingerprints cannot be polished away as easily as they can on gloss acrylic.
- Aim pin spots 15 to 25 degrees off-axis.
- Keep the light between 2700K and 3000K to warm the buttercream without flaring the topper’s face.
Where Black Disappears
Matte black acrylic earns its place against pale buttercream, light plaster walls, and dedicated cake lighting. In front of unpainted brick or a dark-panelled bar under ambient uplighting, a 3mm flat-black topper can read as a smudge of shadow. Smoked grey acrylic, brushed brass, or a table-edge backlight preserves the outline more effectively than increasing the topper size.
That contrast rule holds for light-finished display cakes staged as room features. Dark icing and projection-heavy installations call for a different calculation.
Integrating Favors Into the Dessert Experience
Wedding favors have moved into optional territory. Across recent seasons, boxed favors were increasingly left behind on guest tables, so the planning rule tightened: a favor stays when it already performs a second function.
Place cards offer the clearest pairing. Guests at a seated dinner need to find their names, and they physically pick up the marker assigned to them. A mini concrete succulent pot can therefore serve as place card, industrial table detail, and take-home favor in one compact object.
Concrete Pots With a Job
Cast the pots in 2- to 2.5-inch cube or cylinder molds. Demold them after 24 to 36 hours, then allow another 5 to 7 days of air curing before planting so the concrete’s alkalinity settles. Succulent cuttings should go in 4 to 7 days before the wedding. That gives them time to sit upright in the medium without spending so long in storage that they stretch toward the available light.
Produce the guest count plus 6 to 10 spares. Small concrete pieces can lose one or two units to chipped corners during transport, and replacements must match the same casting batch closely enough to disappear into the table plan.
At the dessert bar, blind-embossed coasters extend the same industrial language without competing with the cake. A blind emboss presses a subtle image into the stock without pigment ink, allowing texture to carry the mark. Use 600gsm double-thick cotton stock or 1.5mm chipboard with a photopolymer die. A 5- to 8-second dwell under pressure helps the impression retain a defined shoulder instead of springing back.
Keeping the Deboss Aligned
A registration jig cut from scrap board keeps the deboss within about 1/8 inch of position across a run of 80 to 150 coasters. That consistency becomes visible when the pieces sit in a stacked row beside plates and forks.
Favor Filter
Keep each object only when it solves a service need. The succulent identifies a seat; the coaster protects the bar; both contribute texture before a guest takes either one home.
Place the pots and coasters after the cake height, topper, and lighting have been approved. Loading the table too early often hides the negative space that made the central display feel architectural in the first place.
Staging the Perfect Cake Cutting Station
The cake cutting lasts only a few moments, and the photographer gets one clean opportunity to frame it. Liam Davis, a Certified Wedding Planner, stages the station in a fixed sequence: knife choice, finish protection, then crumb containment.
A serrated blade is an absolute requirement for fondant. A straight edge compresses the 3- to 5mm fondant sheet, drags it down the side of the tier, and pushes into the cake beneath. Use a 10- to 12-inch serrated blade with a slow sawing motion and no downward pressure.
Temper, Cut, and Clear
Pull the cake from refrigeration 30 to 45 minutes before the ceremonial cut so the buttercream can temper toward a room held around 68 to 72°F. A fully chilled tier tends to crumble instead of producing a clean slice.
After the couple completes the photographed cut, dip the blade in hot water and wipe it completely dry before the first service slices. The warmth clears fat and sugar from the serrations; drying prevents water from streaking the buttercream.
- Place the knife and server on the cutter’s dominant-hand side.
- Use a felt-footed marble or slate tray measuring about 9 by 14 to 10 by 16 inches.
- Set the tray 18 to 24 inches from the cutting position so it stays reachable without entering the cake’s main silhouette.
- Add one folded cloth for wiping the blade between cuts.
- Clear loose favor pots, glassware, and floral stems from the couple’s turning space.
Matte black stainless steel cutlery maintains the high-contrast line established by a dark topper against light buttercream. The finish comes from a PVD coating, which requires prompt hand-washing and immediate drying. Soaking, citrus, and abrasive pads can haze the surface that justified specifying it.
Before guests enter the room, place the knife tray on the dominant-hand side, stand 15 to 18 feet from the table, and take one phone photograph to confirm that the topper, cutting space, and cake edge all read clearly in the same frame.






Write a Comment