
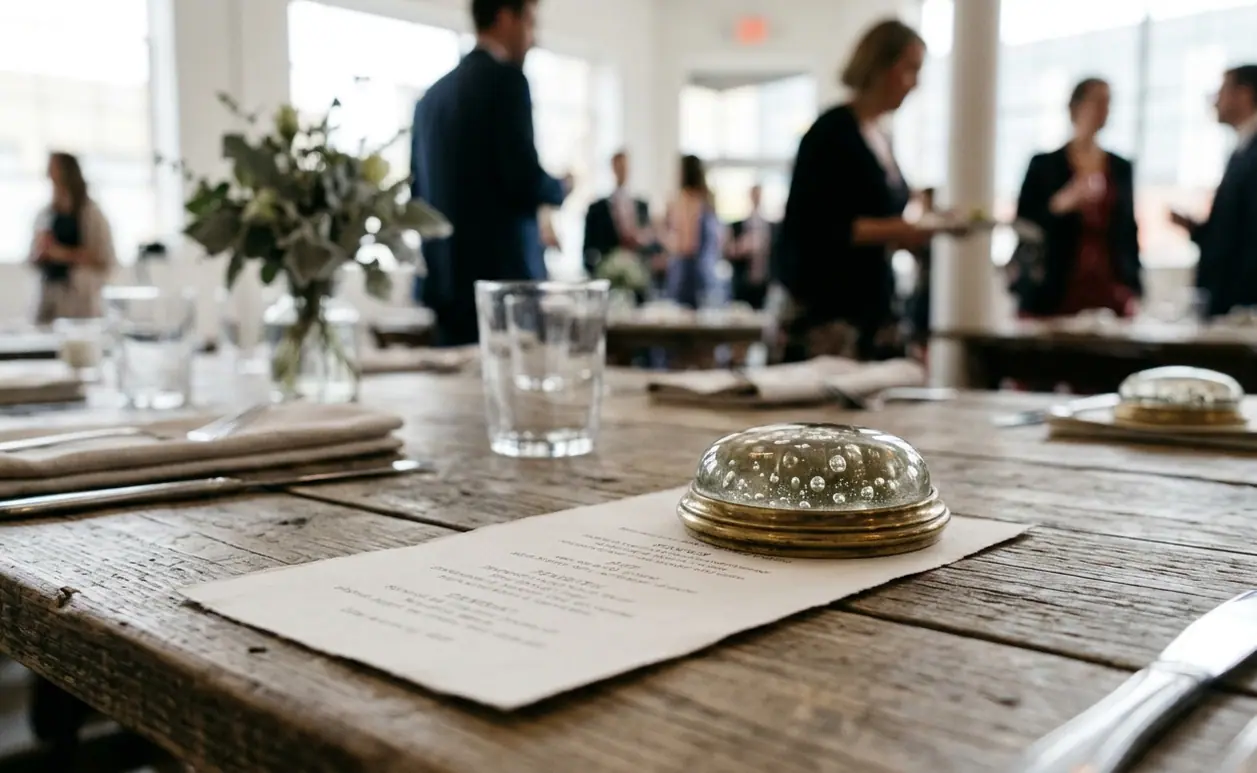
Hand-stamped menus look effortless once they reach the table: crisp lettering, a translucent overlay, perhaps one small brass fastener catching the candlelight. The work behind that finish begins with a less romantic decision. The paper has to be thick enough to hold its shape, receptive enough to take ink, and practical enough to punch, stack, and mail.
Weight labels alone can mislead. Two sheets described as “heavy cardstock” may behave very differently under a stamp or hole punch. A useful specification pairs basis weight with measured thickness, then considers surface finish and ink chemistry.
In this Article
- Reading paper weight before choosing embellishments
- Balancing an A2 card with a vellum overlay
- Pairing dense paper with pigment ink
- Aligning and fastening a layered menu
- Checking postage for rigid stationery
- Building manual processing into the wedding timeline
Reading Paper Weight Before the Embellishments
Paper weight refers to the physical thickness and density of a sheet, dictating how it handles ink, folding, and mechanical fasteners. That baseline measurement comes first, before you settle on vellum, eyelets, ribbon, or any other decorative layer.
Paper suppliers commonly describe stock in pounds or grams per square metre, abbreviated gsm. Those figures help compare products, but caliper tells you how thick a particular sheet actually is. Caliper is usually expressed in thousandths of an inch.
Weight and Caliper Tell Different Stories
Cover stock sold as 110 lb runs roughly 300 gsm and measures about 0.014 inch. An 80 lb cover sheet sits near 216 gsm and roughly 0.010 inch, while 80 lb text paper lands around 118 gsm and 0.006 inch. Three sheets of that text-weight paper still form a thinner stack than one sheet of 110 lb cover.
I reached for the caliper after pulling every sheet in the studio drawer that a supplier had called “heavy.” Two cards carrying essentially the same description measured 0.011 and 0.018 inch. That gap is wide enough to determine whether a punch closes cleanly and whether a fastener has enough barrel depth.
The practical comparison for a hand-stamped menu is therefore between a dense, absorbent foundation and a delicate translucent top layer. That foundation takes stamping pressure and gives the suite structure, while the overlay contributes visual depth and keeps the profile relatively slim.
The Caliper Check
Order samples before committing to a full run. Test the exact sheet with the stamp, punch, and fastener planned for the finished menu. A descriptive label cannot show whether the fibers will crush around a hole or whether the card will remain flat after assembly.
Balancing an A2 Card with a Vellum Overlay
An A2 folded card makes a dependable foundation for DIY menus and coordinating stationery. It arrives flat at 5.5 by 8.5 inches and score-folds to 4.25 by 5.5 inches. The folded card seats inside a 4.375-by-5.75-inch envelope with roughly one-eighth inch of clearance on each side.
At 110 lb cover, the A2 base feels substantial in the hand and gives a stamp enough resistance for a clean impression. Its opacity also hides fastener prongs, registration marks, and any printed guide placed beneath the working sheet.
Vellum Adds Depth Without a Second Heavy Card
Standard translucent vellum runs around 29 lb, or about 110 gsm. Heavier overlay grades in the 40–48 lb range resist curling more effectively across a 5.5-inch span. That difference becomes visible on a reception table, particularly when humidity rises.
In a tent above roughly 60% relative humidity, unsupported vellum bands can cup at their free edges within 6–10 hours. Anchoring the sheet at one point gives it a clean visual pivot while allowing the materials to move slightly.
Adhesive dots create another problem. Under raking candlelight, clear dots read as grey shadows through vellum, while thin double-sided tape can appear as a glossy bar. A small brass fastener becomes an intentional detail rather than something the design has to conceal.

The 100 lb Floor
Sophie Miller, DIY Projects Editor and Professional Calligrapher at Chicago Factory, uses the base card as the structural member when securing vellum with brass mechanical fasteners. A fastener with a one-eighth-inch barrel and split prongs seats cleanly through one vellum band and one sheet of 110 lb cover. Below about 100 lb cover, the barrel can spin in its own hole and the overlay begins to dictate the shape of the card.
That threshold matters. The menu should stay flat when a guest lifts it by one corner, rather than sagging around the embellishment.
Pairing Dense Paper with Pigment Ink
Heavy stock changes the way stamping ink behaves. Surface finish often matters as much as basis weight: an uncoated cotton sheet draws liquid into its fibers, while a clay-finished or coated sheet keeps the same ink wet on top.
Uncoated cotton cover in the 300–600 gsm range can absorb stamping ink within 5–15 seconds. Coated stock of the same basis weight may hold it wet for well over a minute.
Why Pigment Ink Suits the Base Card
Pigment ink is slow-drying and highly opaque. Its color particles sit near the top of a textured paper surface instead of immediately soaking into raised fibers and feathering. That produces fuller lettering on cotton and felt-finish stocks, especially around fine serifs.
The handling window requires patience. On uncoated 110 lb cover, pigment ink remained transferable for roughly 45–90 seconds. Heavily textured felt-finish stock needed closer to 2–3 minutes before passing a fingertip drag test. Dye-based ink set on the same cotton cover in under 15 seconds, though feathering appeared where the serifs crossed raised fibers.
Vellum Ink Warning
Pigment ink earns its place on porous, absorbent stock. On vellum, acetate, or coated menu boards, it can remain liftable for days and offset onto the sheet above. Heat-emboss a pigment-stamped vellum band or switch to a compatible solvent ink.
For heat embossing, powder over pigment ink sets in about 15–25 seconds with the heat tool held 3–4 inches from the sheet. Keep the tool moving over vellum to reduce rippling. These handling windows apply to the named paper surfaces; finish chemistry can change the result even when the gsm figure stays the same.
Use a Gel Pen for Written Details
Stamping ink and writing ink solve different problems. A 0.7 mm Pilot G-2 gel pen lays down a continuous line over raised-grain cardstock where a 0.5 mm rollerball can skip at roughly every third letter. The broader gel flow bridges small valleys in the paper texture without requiring excessive pressure.
Test the pen on an offcut, then let the line dry before stacking. That small pause protects both the lettering and the back of the next menu.
Aligning and Fastening a Layered Menu
Thick menus reward an assembly line. Separate the work into registration, stamping, drying, punching, and fastener setting. Trying to complete one menu from beginning to end creates idle time while ink dries and makes alignment errors harder to spot across the batch.
Backlight the Registration Guide
A light box or LED light pad lets a printed guide show through opaque cover stock. Run the pad near full output for 110 lb cover and place only one card over the guide; through two stacked cover sheets, the grid becomes difficult to read.
A guide ruled at three-eighth-inch intervals with a marked centre axis kept stamp placement within about 1 mm across a batch of twenty menus. Position the guide once, tape its corners outside the card area, and register every blank against the same two edges.
This method also works for lettering straight address lines on thick envelopes. The backlight replaces pencil rules, so there is nothing to erase from a soft cotton surface afterward.
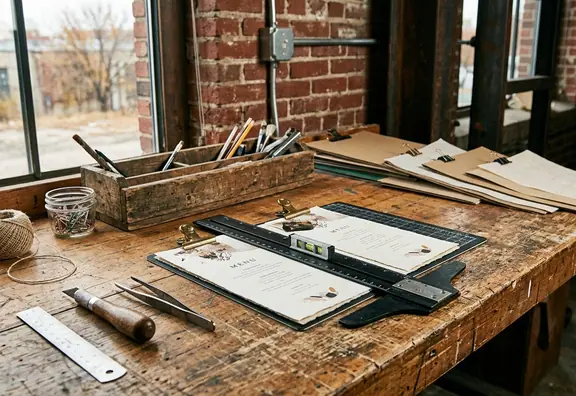
Punch First, Then Seat the Fasteners
The Crop-A-Dile is built for the dense stack an ordinary office punch struggles to cut. Its handheld lever can make one-eighth-inch and three-sixteenths-inch holes through a stack up to roughly one-eighth inch thick, enough for one vellum band plus two cover sheets.
A typical office punch is rated for about ten sheets of 20 lb bond. On a single 300 gsm folded card, it may compress the fibers and leave a torn edge instead of a round opening.
- Mark the hole position on a reusable guide rather than on every finished card.
- Align the vellum and base card against the same guide edges.
- Punch the complete layer stack so the holes share one centre.
- Insert the brass barrel from the visible side.
- Open and flatten the split prongs on the reverse without crushing the paper.
For a hundred-piece suite, punching and seating generally occupy 3–4 working sessions of 90 minutes when handled as separate batches. Inspect the first five assemblies before punching the rest. A slight guide error becomes expensive once it repeats across a full stack.
Checking Postage for Rigid, Fastened Suites
A layered suite must be evaluated as a finished physical object. Build one complete prototype with the base card, vellum band, seated fastener, insert, addressed envelope, and seal. Carry that exact piece to a retail postal counter for weighing and hand measurement.
The four-object weigh-in is useful during assembly: check the base card, vellum band, seated brass fastener, and sealed envelope separately before choosing a stamp denomination. The fastener contributes little weight, yet it changes the profile enough to affect postal handling.
Why the Brass Bump Changes the Mail Class
The postal non-machinable classification covers traits such as rigidity, uneven thickness, clasps or buttons, square envelopes, and thickness beyond about one-quarter inch. A set brass fastener creates uneven thickness by itself.
Its barrel adds a localized bump of roughly one-sixteenth to one-eighth inch to an otherwise flat envelope. That raised point can stall standard sorting equipment. Heavy cardstock, vellum, and a brass fastener therefore mean this construction needs non-machinable handling and extra postage.
A fastener can add very little weight and still change the postal class of the entire envelope.
Prototype Before Postage
Assemble and weigh the finished prototype 3–4 weeks before the intended mail date. That window leaves time to order different envelopes if the surcharge changes the budget. Buy 8–12 spare stamps beyond the guest count for late additions and re-addressed pieces.
Building Manual Mail into the Wedding Calendar
Heavy, eyelet-bound stationery creates a timeline constraint as soon as the design is approved. Manual processing takes longer at the originating office, and the assembly work happens before the envelopes reach the counter.
Count Back from the Guest Delivery Date
Hand-cancelling a non-machinable batch typically adds 2–4 business days before the mail enters transit. Punching, setting fasteners, banding, and addressing a hundred suites realistically fills 2–3 weeks of evenings. Put both periods on the calendar rather than treating them as spare time.
Invitations in this construction should reach guests 10–12 weeks before the wedding. To absorb the manual-processing interval, plan to drop the finished batch at the counter closer to 13–14 weeks out.
Save the Dates need a wider runway. For a local Midwest wedding, mail heavy, fastened cards 6–8 months ahead. The embellishment that takes seconds to admire at the table has already shaped months of production and mailing decisions.
For a destination wedding using the same eyelet-bound construction, the mail date moves further out, to 9–12 months before the celebration.




Write a Comment