You Can Absolutely Do This
In my years teaching calligraphy and paper-craft workshops, I've watched hundreds of people walk in convinced they "aren't creative" and leave with museum-worthy invitations in their hands. The secret? It's not talent—it's technique. And technique can be taught.
Here's what I tell every nervous bride at her first workshop: DIY doesn't mean "cheap." It means "made with intention." The difference between a craft project and luxury stationery isn't the price tag—it's the quality of your materials, the precision of your method, and the confidence to keep going when the first stamp comes out slightly crooked (it happens to all of us!).
The DIY Stationery Journey
- The Invitation Suite Stamps, seals, and calligraphy that create the first impression of your wedding style.
- The Paper Details Menus, programs, place cards, and all the day-of pieces that tie your vision together.
- The Finishing Touches Thank you cards, napkins, coasters, and guest books that extend your story beyond the big day.
Explore Our DIY Tutorials
Wedding Invitation Stamps
The "faux letterpress" secret. Custom rubber stamps, ink selection, and technique for professional results. Read the Tutorial →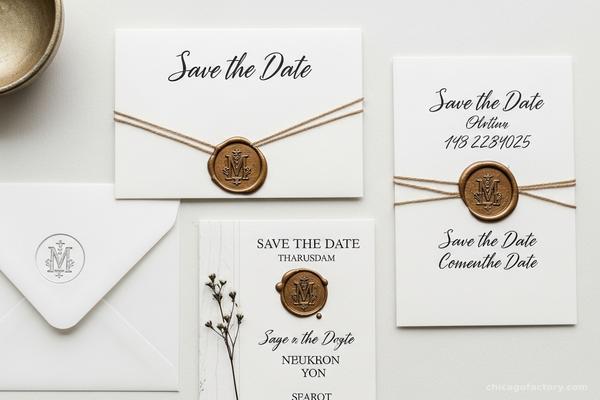
Save the Date Ideas
Creative formats beyond the magnet. Photo cards, vellum wraps, and stamp-forward designs. Read the Tutorial →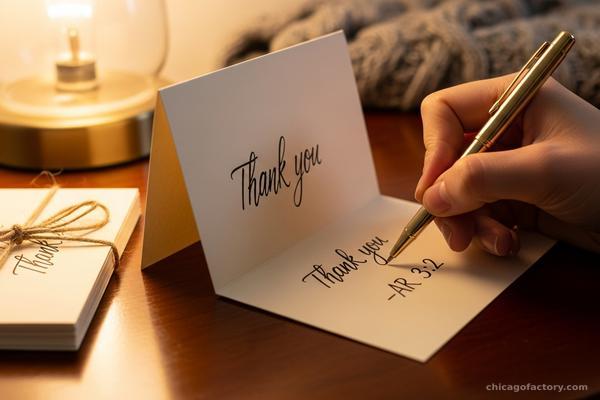
Thank You Card Etiquette
When to send, what to write, and how to make beautiful handmade cards from leftover supplies. Read the Tutorial →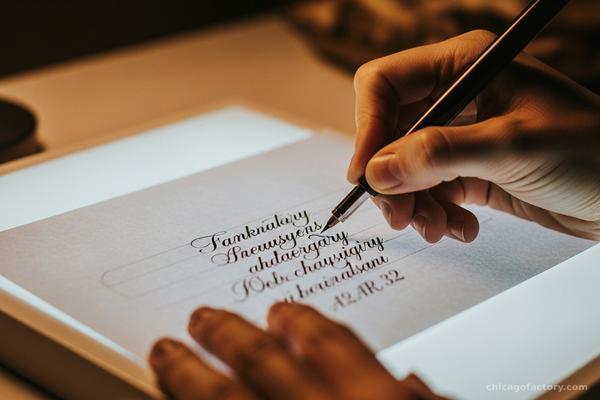
Envelope Addressing Hacks
The light box trick, centering guides, and shortcuts for perfect hand-lettering every time. Read the Tutorial →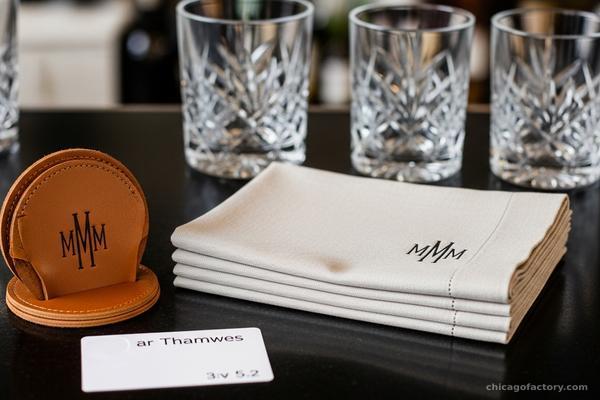
Personalized Napkins & Coasters
Heat transfer, stamp techniques, and materials that actually hold up at the bar. Read the Tutorial →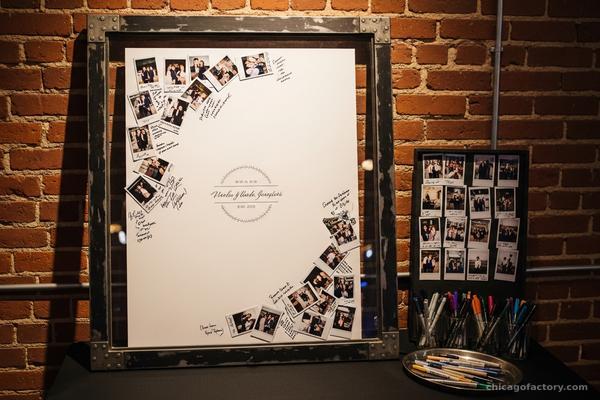
Guest Book Alternatives
Beyond the blank journal. Polaroid walls, signed prints, and keepsakes you'll actually display. Read the Tutorial →Building Your DIY Toolkit
Before you start any project, let's talk supplies. The right tools don't just make your life easier—they make the difference between "obviously homemade" and "wait, you made this yourself?"
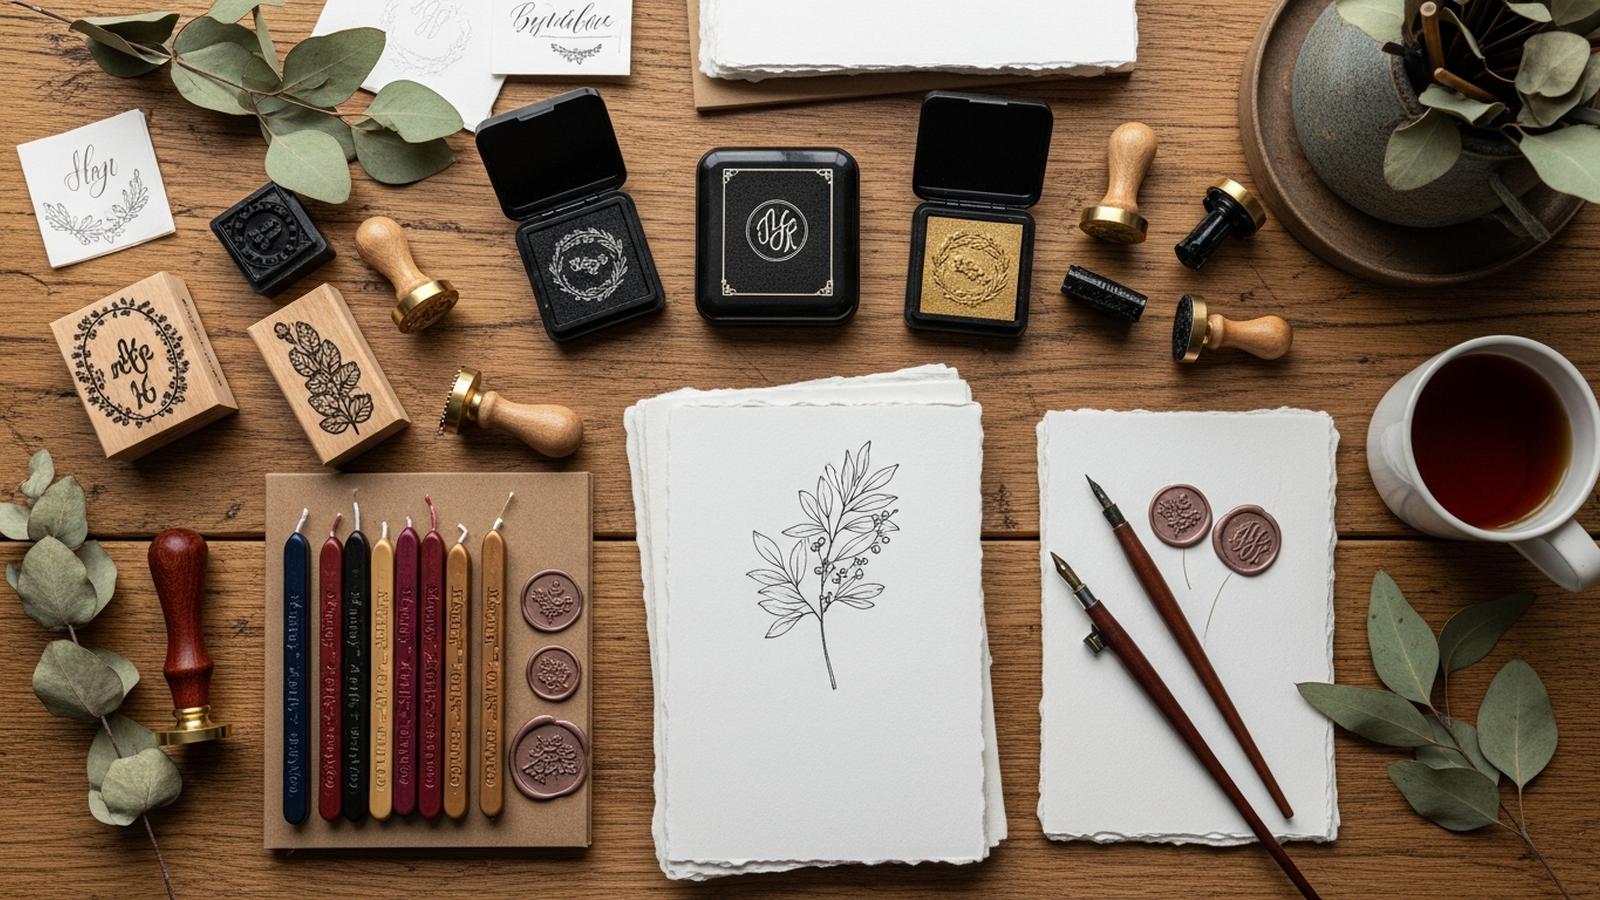
The Essential Starter Kit
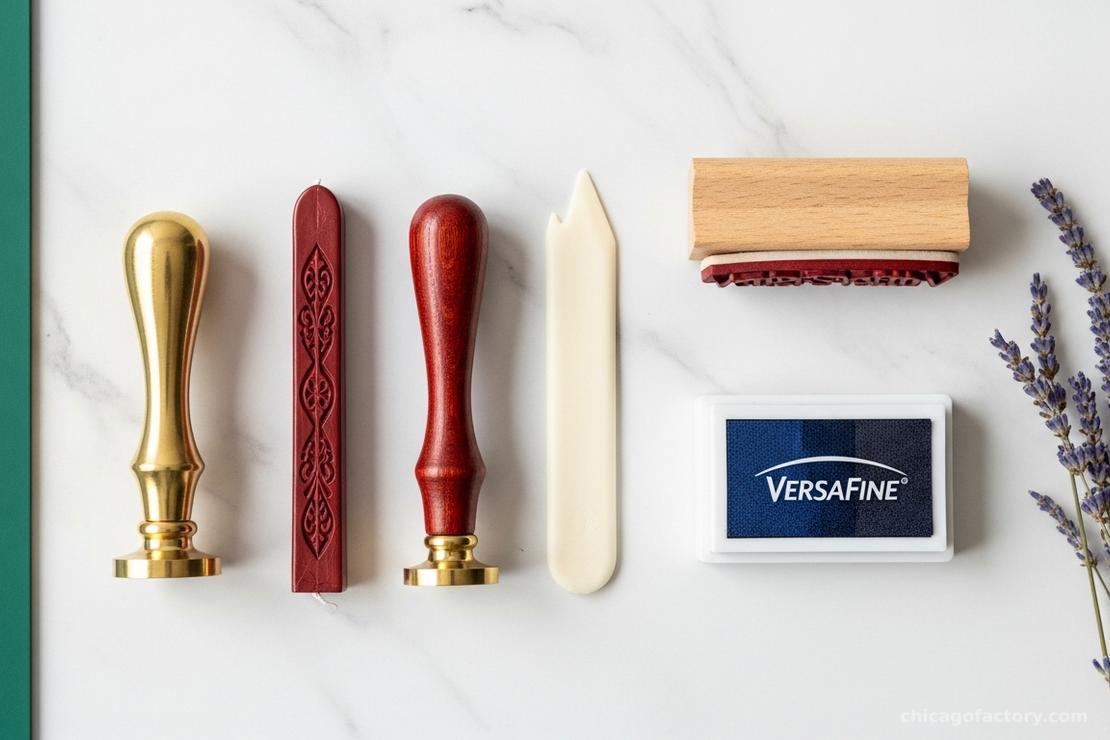
- Custom Rubber Stamp: Order a "deep etch" stamp with wood mount. Avoid self-inking—you need pressure control.
- Pigment Ink Pads: VersaFine for crisp black lines, Delicata for metallics. Pigment sits on paper; dye soaks in.
- Quality Paper: 110lb minimum for cards, cotton rag for that letterpress feel. Never use copy paper!
- Wax Seal Kit: Sealing wax sticks (not beads for beginners), a brass stamp, and a glue gun for bulk sealing.
- Bone Folder: For crisp folds without cracking. Your fingernail is not a substitute.
- Light Box or Bright Window: Essential for envelope addressing and tracing guides.
Don't be afraid to invest in quality supplies upfront. A $30 stamp will serve you for invitations, thank you cards, favor tags, and holiday cards for years. The cost-per-impression is pennies.
The Paper Matters (A Lot)
If I had to give one piece of advice to every DIY bride, it would be this: upgrade your paper. You can have the most beautiful stamp in the world, but if you press it onto flimsy cardstock, the result will look cheap.
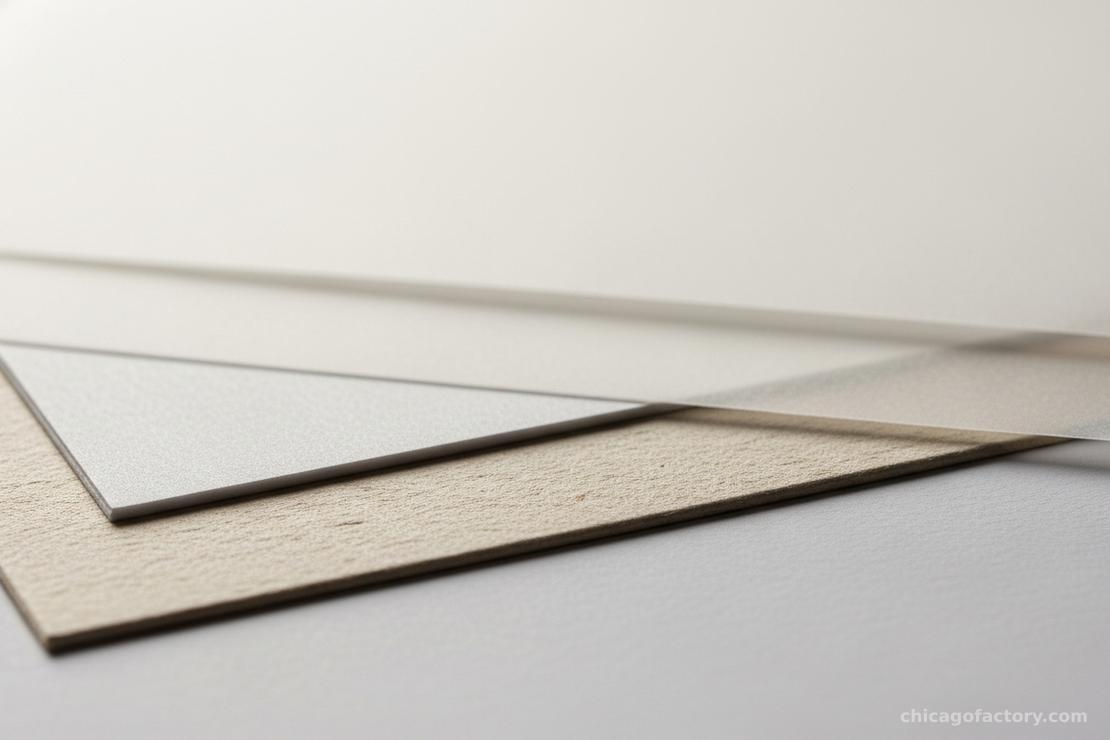
Paper Weight & Texture Guide
- 65lb Cardstock: Too thin for invitations. Fine for inserts or RSVP cards tucked inside a suite.
- 110lb Cardstock: The sweet spot for most DIY projects. Sturdy, feeds through home printers, takes ink well.
- 220lb Cotton Rag: Luxury territory. This is what letterpress printers use. The texture grabs ink beautifully.
- Vellum: Translucent overlay for layered effects. Not for stamping directly—ink won't dry properly.
Pro tip: always order 20% more paper than you think you need. Mistakes happen, and matching paper from a second batch can be tricky. I build "practice sheets" into every supply order.
Technique Over Talent
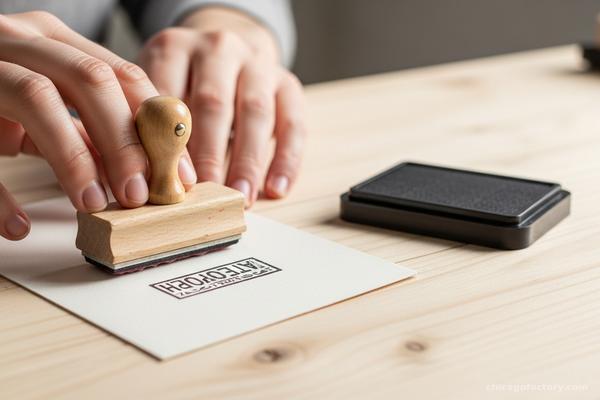
Let me share the golden rule I teach in every workshop: Take the ink to the stamp, not the stamp to the ink.
Most beginners mash their stamp into the ink pad, which overloads the edges and creates messy "halo" lines around the design. Instead, flip your stamp rubber-side up. Tap the ink pad gently across the surface until it's evenly coated. This single technique improvement transforms results overnight.
Connecting Paper to Place
Your stationery suite doesn't exist in isolation—it's the first chapter of your wedding's visual story. The stamps, colors, and textures you choose should preview what guests will experience on the day.
Here's how our DIY guides connect to the rest of your wedding design:
- Stamps → Signs: The monogram stamp you create for invitations can be supersized for a Welcome Sign or pressed onto favor bags.
- Color Palette → Decor: The ink colors you choose should echo in your Table Numbers and napkins.
- Paper Texture → Venue: Cotton rag paper and wax seals scream "Industrial Romance." They belong with brick walls and candlelight, not plastic chairs and fluorescent lights. See our Venue Styling Guide for context.
The DIY Timeline
Paper projects require more lead time than most couples expect. Here's the realistic timeline I share with workshop students:
6-8 Months Before
Design and order custom stamps. Source paper samples and test ink colors. Practice technique on scrap paper (a lot!).
4-6 Months Before
Finalize invitation wording. Production week: stamp, seal, assemble suites. Address envelopes (this takes longer than you think).
3 Months Before
Mail invitations. Begin day-of paper pieces: menus, programs, place cards.
Post-Wedding
Thank you cards within 3 months of the wedding. Reuse stamps for holiday cards and address labels forever!
The biggest mistake I see? Starting invitations 6 weeks before the wedding. You'll be stressed, make mistakes, and won't enjoy the creative process. Give yourself time to actually have fun with it!
Frequently Asked Questions
Absolutely! That's the beauty of stamps—they do the beautiful lettering for you. For envelope addressing, you can use printed labels with a nice font, or try a light box to trace a computer-printed guide. Calligraphy can be learned, but it's not required for stunning DIY stationery.
A letterpress suite from a professional printer typically runs $800-2,000 for 100 invitations. A DIY stamp suite with quality materials will cost $150-300 for the same quantity, including the stamp (which you keep forever). The savings are significant, but the real value is customization—you control every detail.
Some can be fixed, some become "rustic character!" A slightly off-center stamp? That's fine—handmade should look handmade. Smeared ink? Let it dry, then cover with a wax seal strategically placed over the smudge. Major disaster? This is why we order 20% extra paper. Toss it and try again.
For wedding-quality stamps, I recommend Etsy artisans who specialize in "deep etch" rubber stamps. Look for shops with photos of actual impressions, not just digital mockups. Turnaround is typically 1-2 weeks. Avoid big-box craft stores for custom designs—the quality difference is noticeable.
Ready to Start Making?
Every project in this archive includes step-by-step instructions, material lists, and troubleshooting tips. Start with one small project—maybe envelope addressing—and build confidence from there. You've got this!
Questions about a specific technique? Want to share your creations? Reach out through our Contact Page or learn more about Sophie and the team at Our Story.