Branding Your Bar: DIY Stamped Napkins and Coasters
The Devil is in the Details
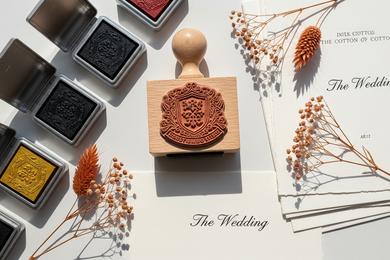
If you've been following my tutorials, you know I love a "repeat motif." There is something so satisfying about seeing the same logo from your Save the Date appear on your wedding day cocktail hour. It makes the whole event feel branded, curated, and expensive.
But here is the secret: You don't need to order thousands of pre-printed napkins. With the right ink and a little patience, you can turn generic bar supplies into custom decor. Grab your stamp—the same one we used for your Wedding Invitation Stamps—and let’s get to work!
Project 1: The Custom Cocktail Napkin
You have two choices here: paper or linen. For a high-volume wedding bar, high-quality paper is practical. For a smaller dinner or the head table, linen adds that tactile luxury.
The Ink Matters
This is where most DIYers fail. You cannot use standard water-based ink on a napkin; it will bleed the second a condensation-covered glass touches it.
For Paper: Use a Pigment Ink (like VersaFine). It sits on top of the fibers and dries crisp.
For Linen: Use a Fabric Ink (like VersaCraft). Important: You must heat-set this with an iron after it dries to make it permanent!
The Technique
Napkins are soft and absorbent. If you press too hard, the ink will spread. Use a light touch. I recommend stamping a test batch of 10 to get your pressure right before tackling the full stack of 200.
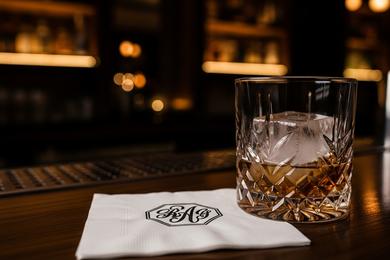
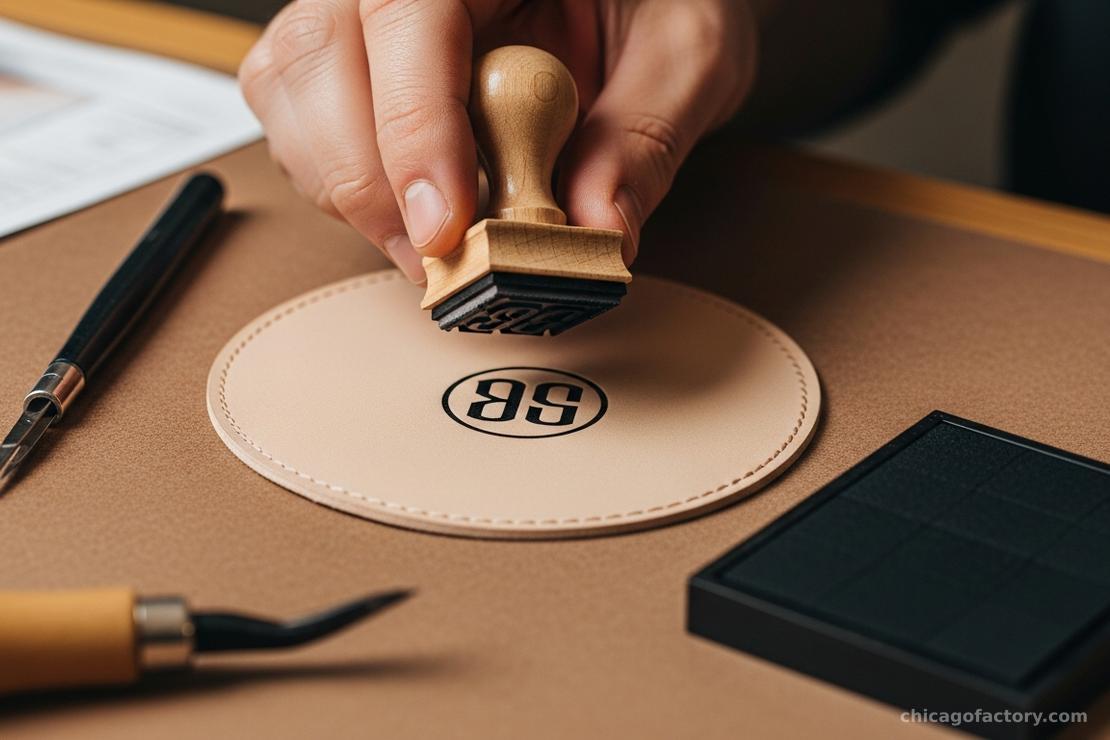
Project 2: Industrial Leather Coasters
If you really want to lean into the "Industrial Romance" vibe, swap the cardboard coaster for leather. Vegetable-tanned leather rounds are surprisingly affordable in bulk, and they age beautifully.
Stamping on Leather
Leather is non-porous, meaning standard ink will just wipe right off. You need a Solvent Ink (StazOn is the industry gold standard). It smells a bit like almond extract and dries instantly.
- Step 1: Place your leather round on a flat, hard surface.
- Step 2: Ink your stamp thoroughly with the solvent ink. Work quickly—it dries fast!
- Step 3: Press down firmly and do not rock the stamp. Rocking creates blurred edges. Lift straight up.
Styling the Bar
Once you have your custom goods, presentation is key. Don't hide them in a pile. Fan the napkins out in a geometric holder. Stack the leather coasters near the whiskey selection to complement the Personalized Flasks your groomsmen might be carrying.
Color coordination is also crucial. If your venue has copper accents, consider using a metallic copper ink on a dark navy napkin. We explore these combinations in our Metallic Color Palettes guide.
Frequently Asked Questions
You can, but do you want to? My rule of thumb: DIY the "VIP" items. Stamp 50 napkins for the cocktail hour or the cake table. For the messy late-night open bar, plain napkins are totally fine. Save your sanity!
If you use the correct ink and let it dry fully (I recommend 24 hours), it will not transfer. However, avoid stamping right on the edge where people wipe their mouths. Keep the logo in the corner or center.
Look for "leather crafting blanks" or "leather rounds" online. You want "vegetable tanned" tooling leather, which is pale and darkens over time, or pre-dyed latigo leather for a sleek black look.
About the Author